GPSR General Product Safety Regulations.
Responsible Economic Operator details on back page of instructions.
When using the Carbtune the vehicle or engine of any type has to be stationary, in neutral (and park in automatic), stable and on its stand or paddock stand or similar.
The Carbtune must not be used on a moving vehicle.
This is not a toy. Keep away from children.
When cutting the tubes please do so safely.
Please use appropriate gloves to protect your hands when cutting hoses and restricters and to protect your hands from hot engine cases.
When synchronising, the engine and the exhaust system can get very hot. Avoid contact with these components to prevent burns. Use mechanics gloves.
Fuel is highly combustible and fumes are dangerous. Do not smoke or have naked flames while synchronising. Work in a well ventilated area to avoid exhaust and fuel fumes.”
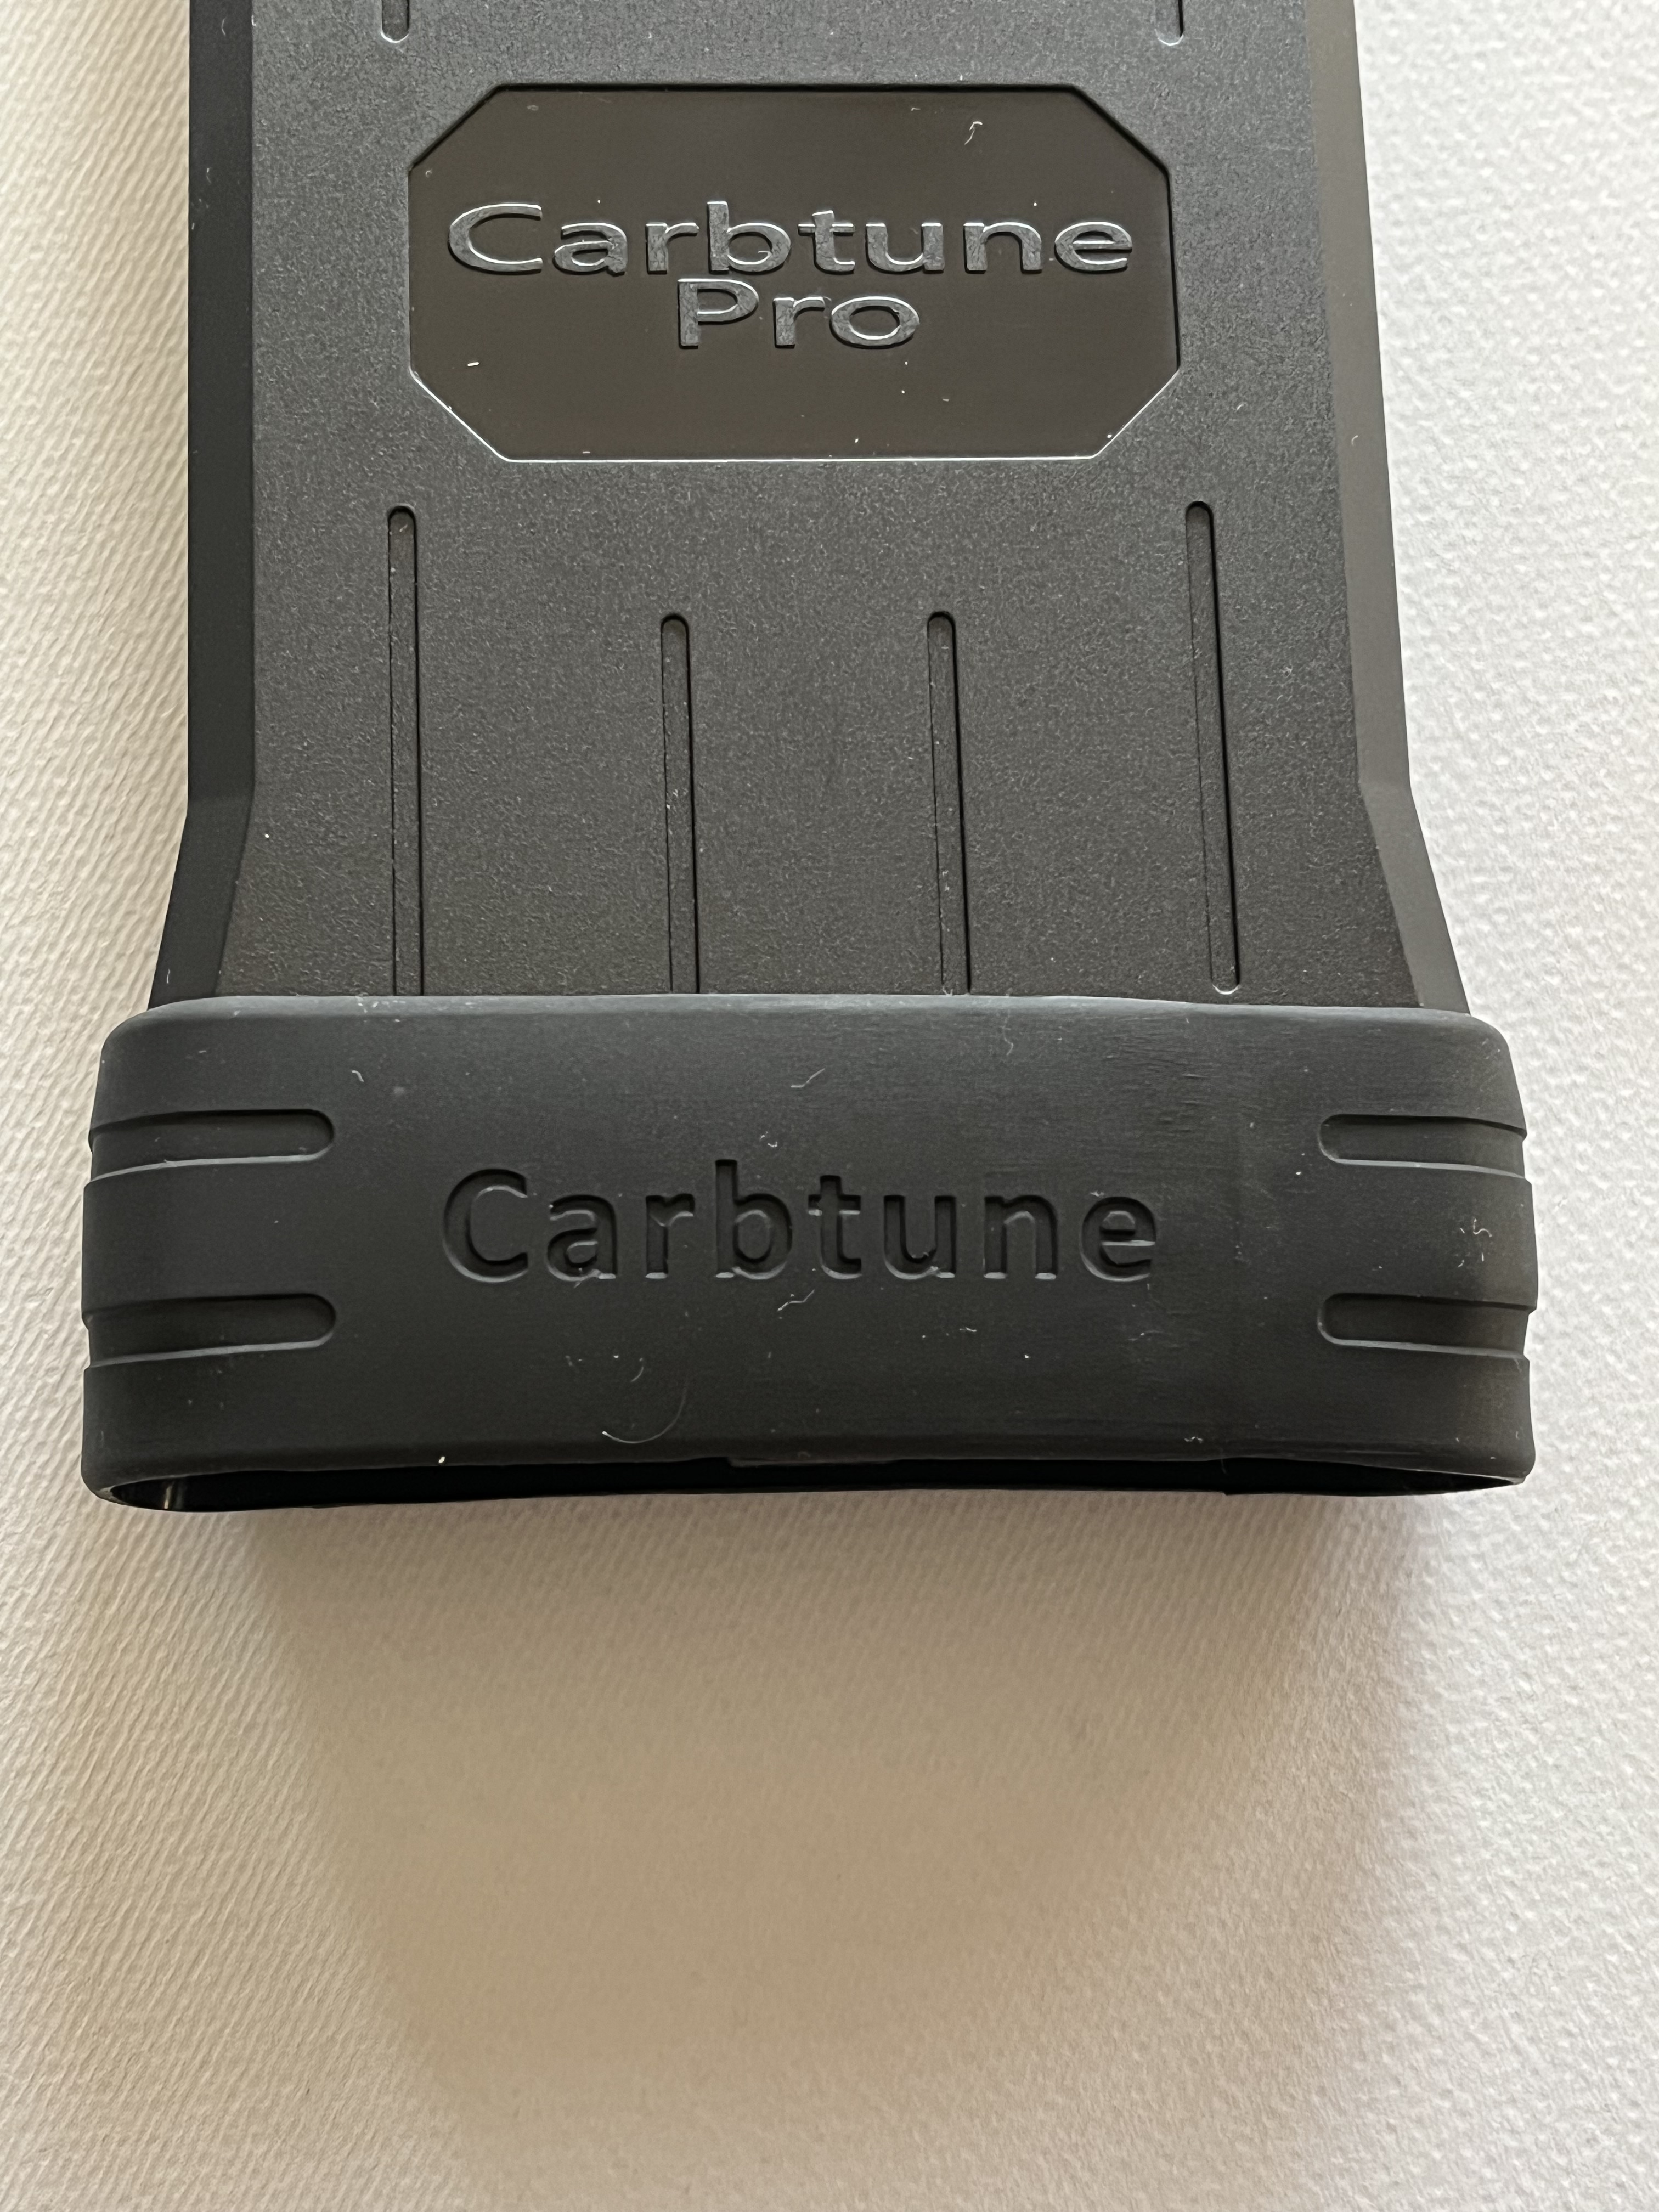
Description
The Carbtune Pro is a mechanical manometer. It is an upgraded model of the previous Carbtune II(In the instructions the four column model is described. The 2-column model has half the contents of the 4-column.)
It gives four simultaneous readings so you can balance the throttle valves on carburettor or fuel injection bodies. (In the instructions the term carb refers to both fuel injection throttle bodies and carburettors.) Stainless steel rods indicate the vacuum on the scale. The clear tubes are made from high impact plastic. Damping is by a small airflow restricter in the rubber connecting tubes.
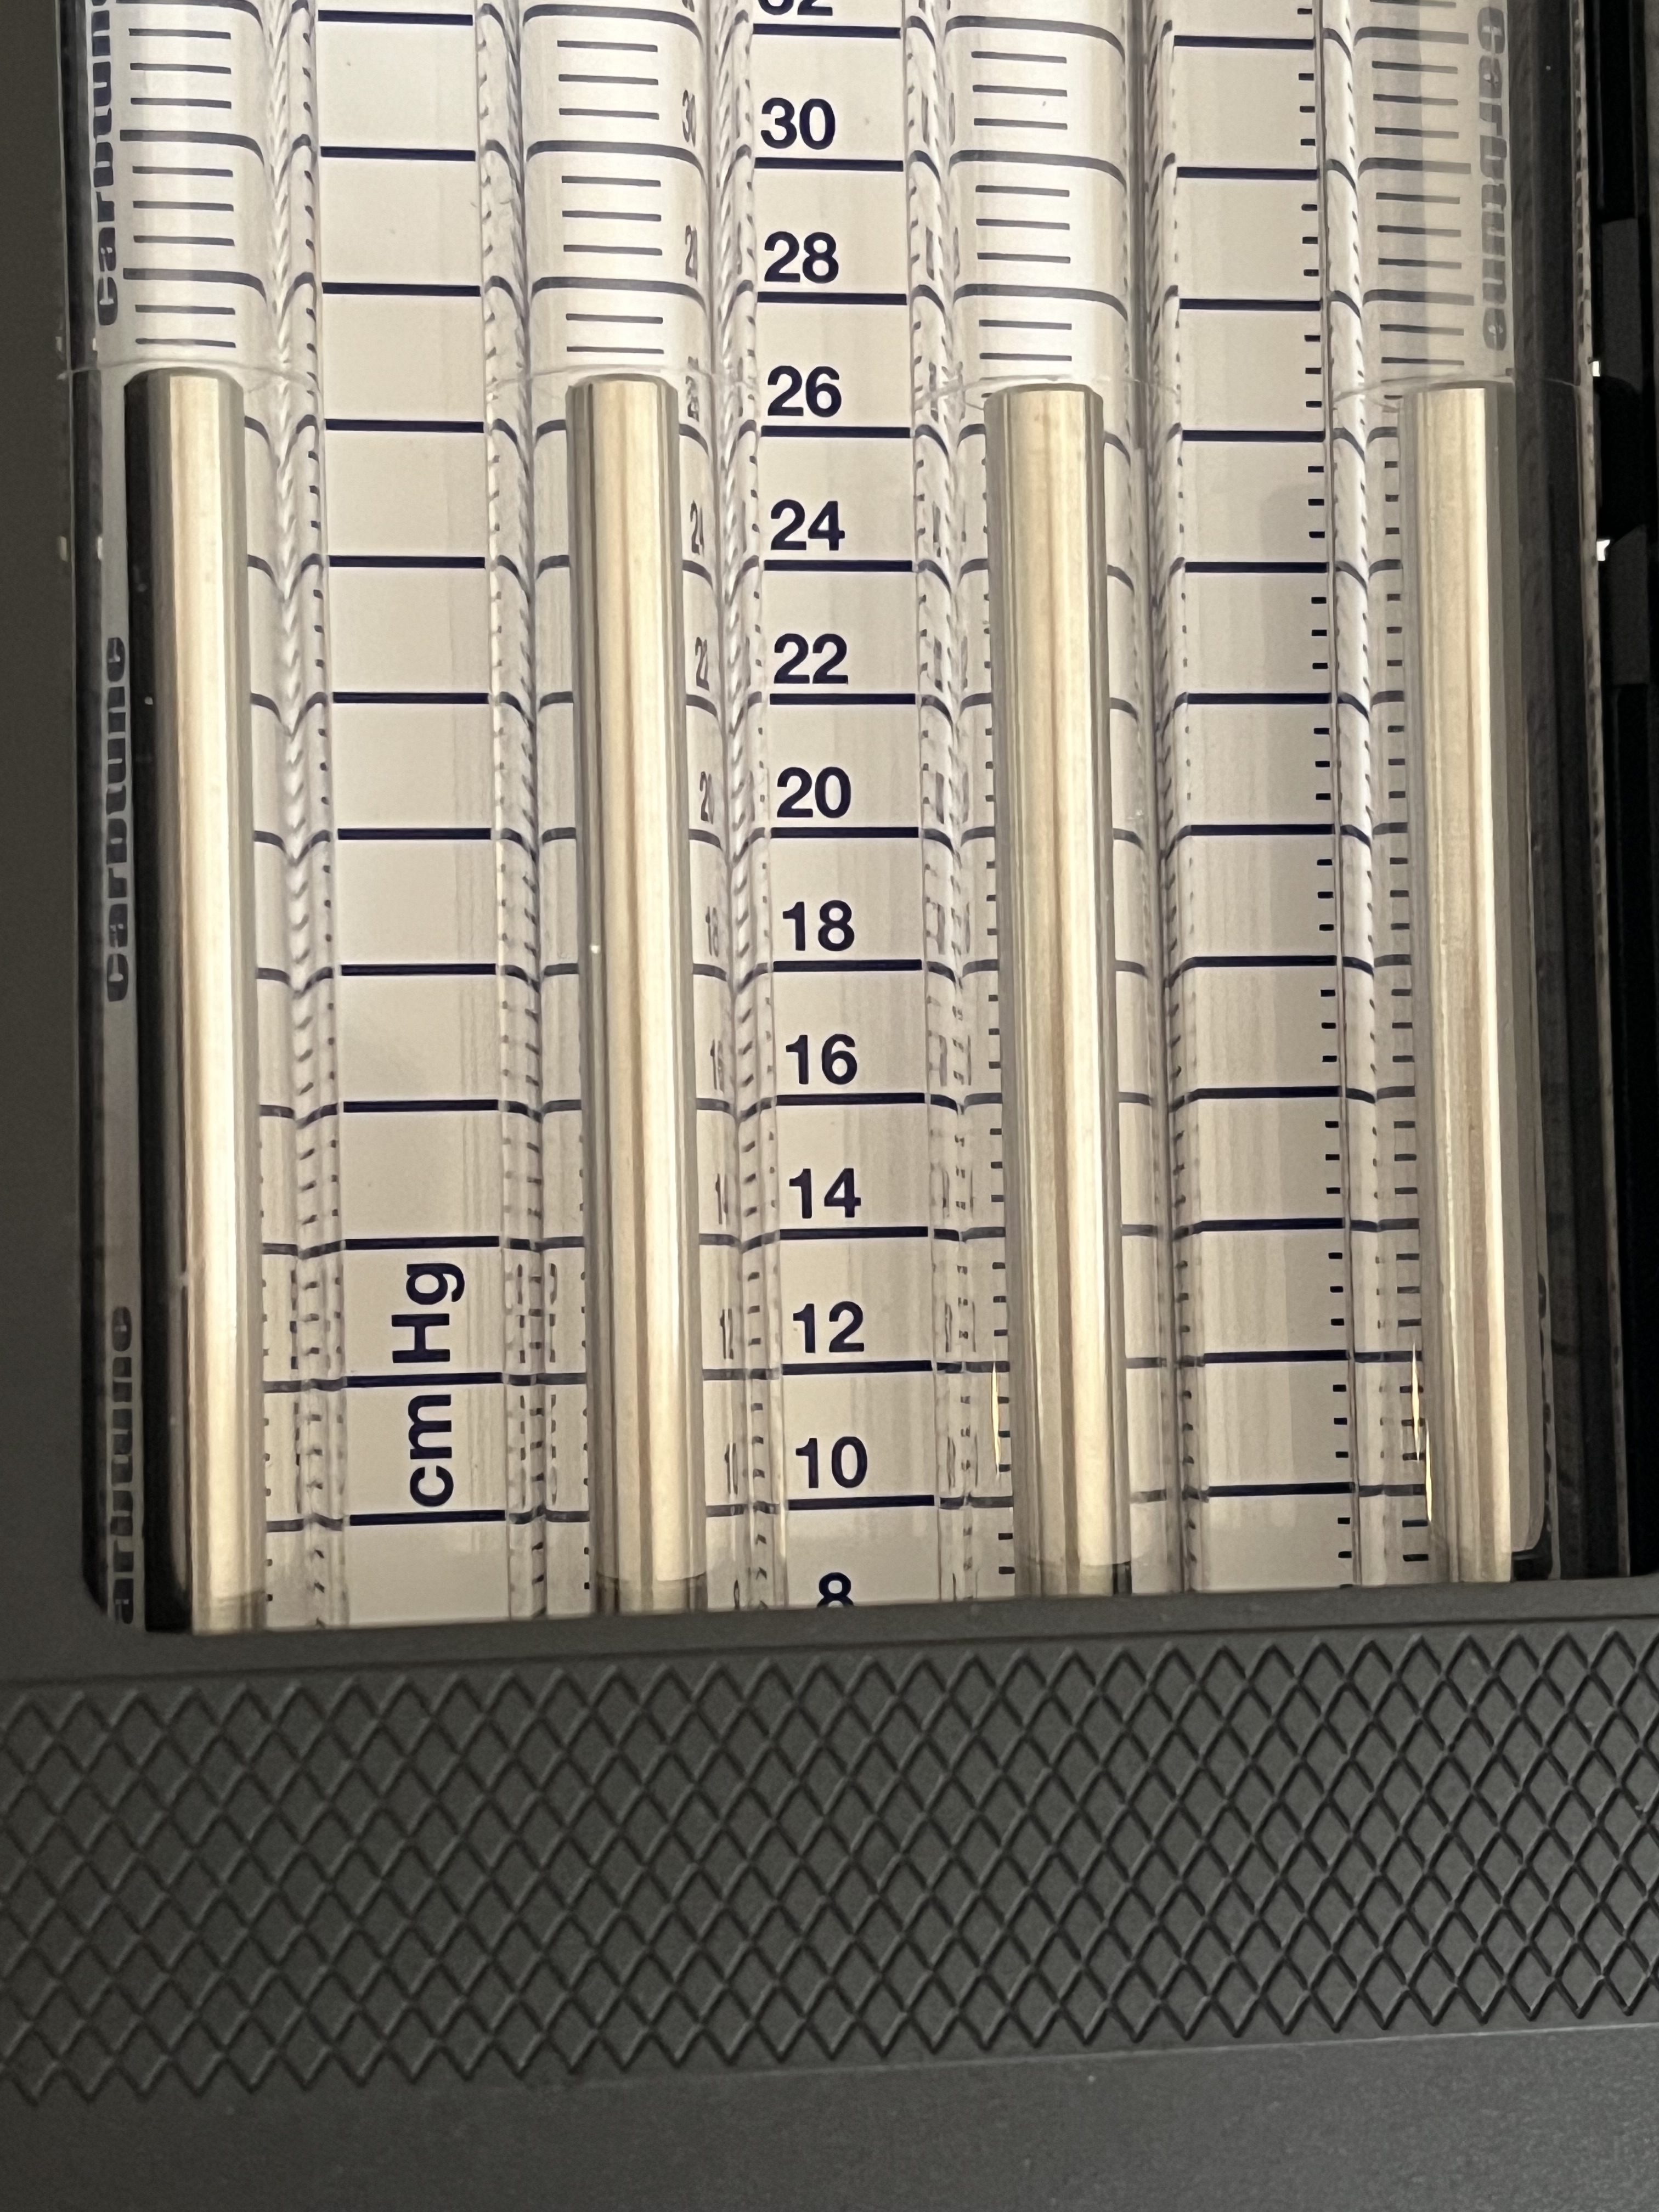
The manometer must be used vertically for a scalestarting at 8cmHg (centimetres of mercury. 1 inch=2.5cm 1cm=0.4inches)and going to 42cmHg. Most bikes have readings higher than 8cmHg, butsome bikes such as R-series BMWs and two strokes can have readingslower than this.
To get a reading below 8cmHg remove the plastic cable clip from the slot at top of gauge and insert it into the slot at the bottom. Push cable clip into slot from front of gauge. Hang the Carbtune Pro upside-down.
Ignore the scale figures. Zero will now be around 16cmHg on the scale but the full width scale graduations will still be 2cmHg. Absolute values are not important. Comparisons are important.
In these instructions the four column modelis described.
The 2-column model has half the contents of the 4-column.
The term “carb” refers to both fuel injection bodies and carburettors.
Contents
The Carbtune Pro, rubber tubes, pcable
tie to hang gauges from the handlebars, inside the small plastic bag there are4 x 5mm adapters, 4 x 6mm adapters and one fine bore thick wall
translucent blue plastic tube about 8cm (3”) long by 5mm (0.2”) diameter to make the restricters.
There is a slot on the spigot of the adapter so they can be removed with a small screwdriver. Do not tighten with a screwdriver.
Set-Up
Damping. The restricters must always be used.
Without restricters the rods will fluctuate wildly. There are two components to the damping.
1. The small amount of friction between the rods and guides which is overcome as soon as the pulsating vacuum of the engine is connected. This friction can vary from tube to tube in the Carbtune and is not a fault.
2. The air-flow restricters that fit inside the rubber tubes and damp the fluctuations. There will always be a small amount of fluctuation and this is necessary for the gauges to work properly. Do not oil the rods.
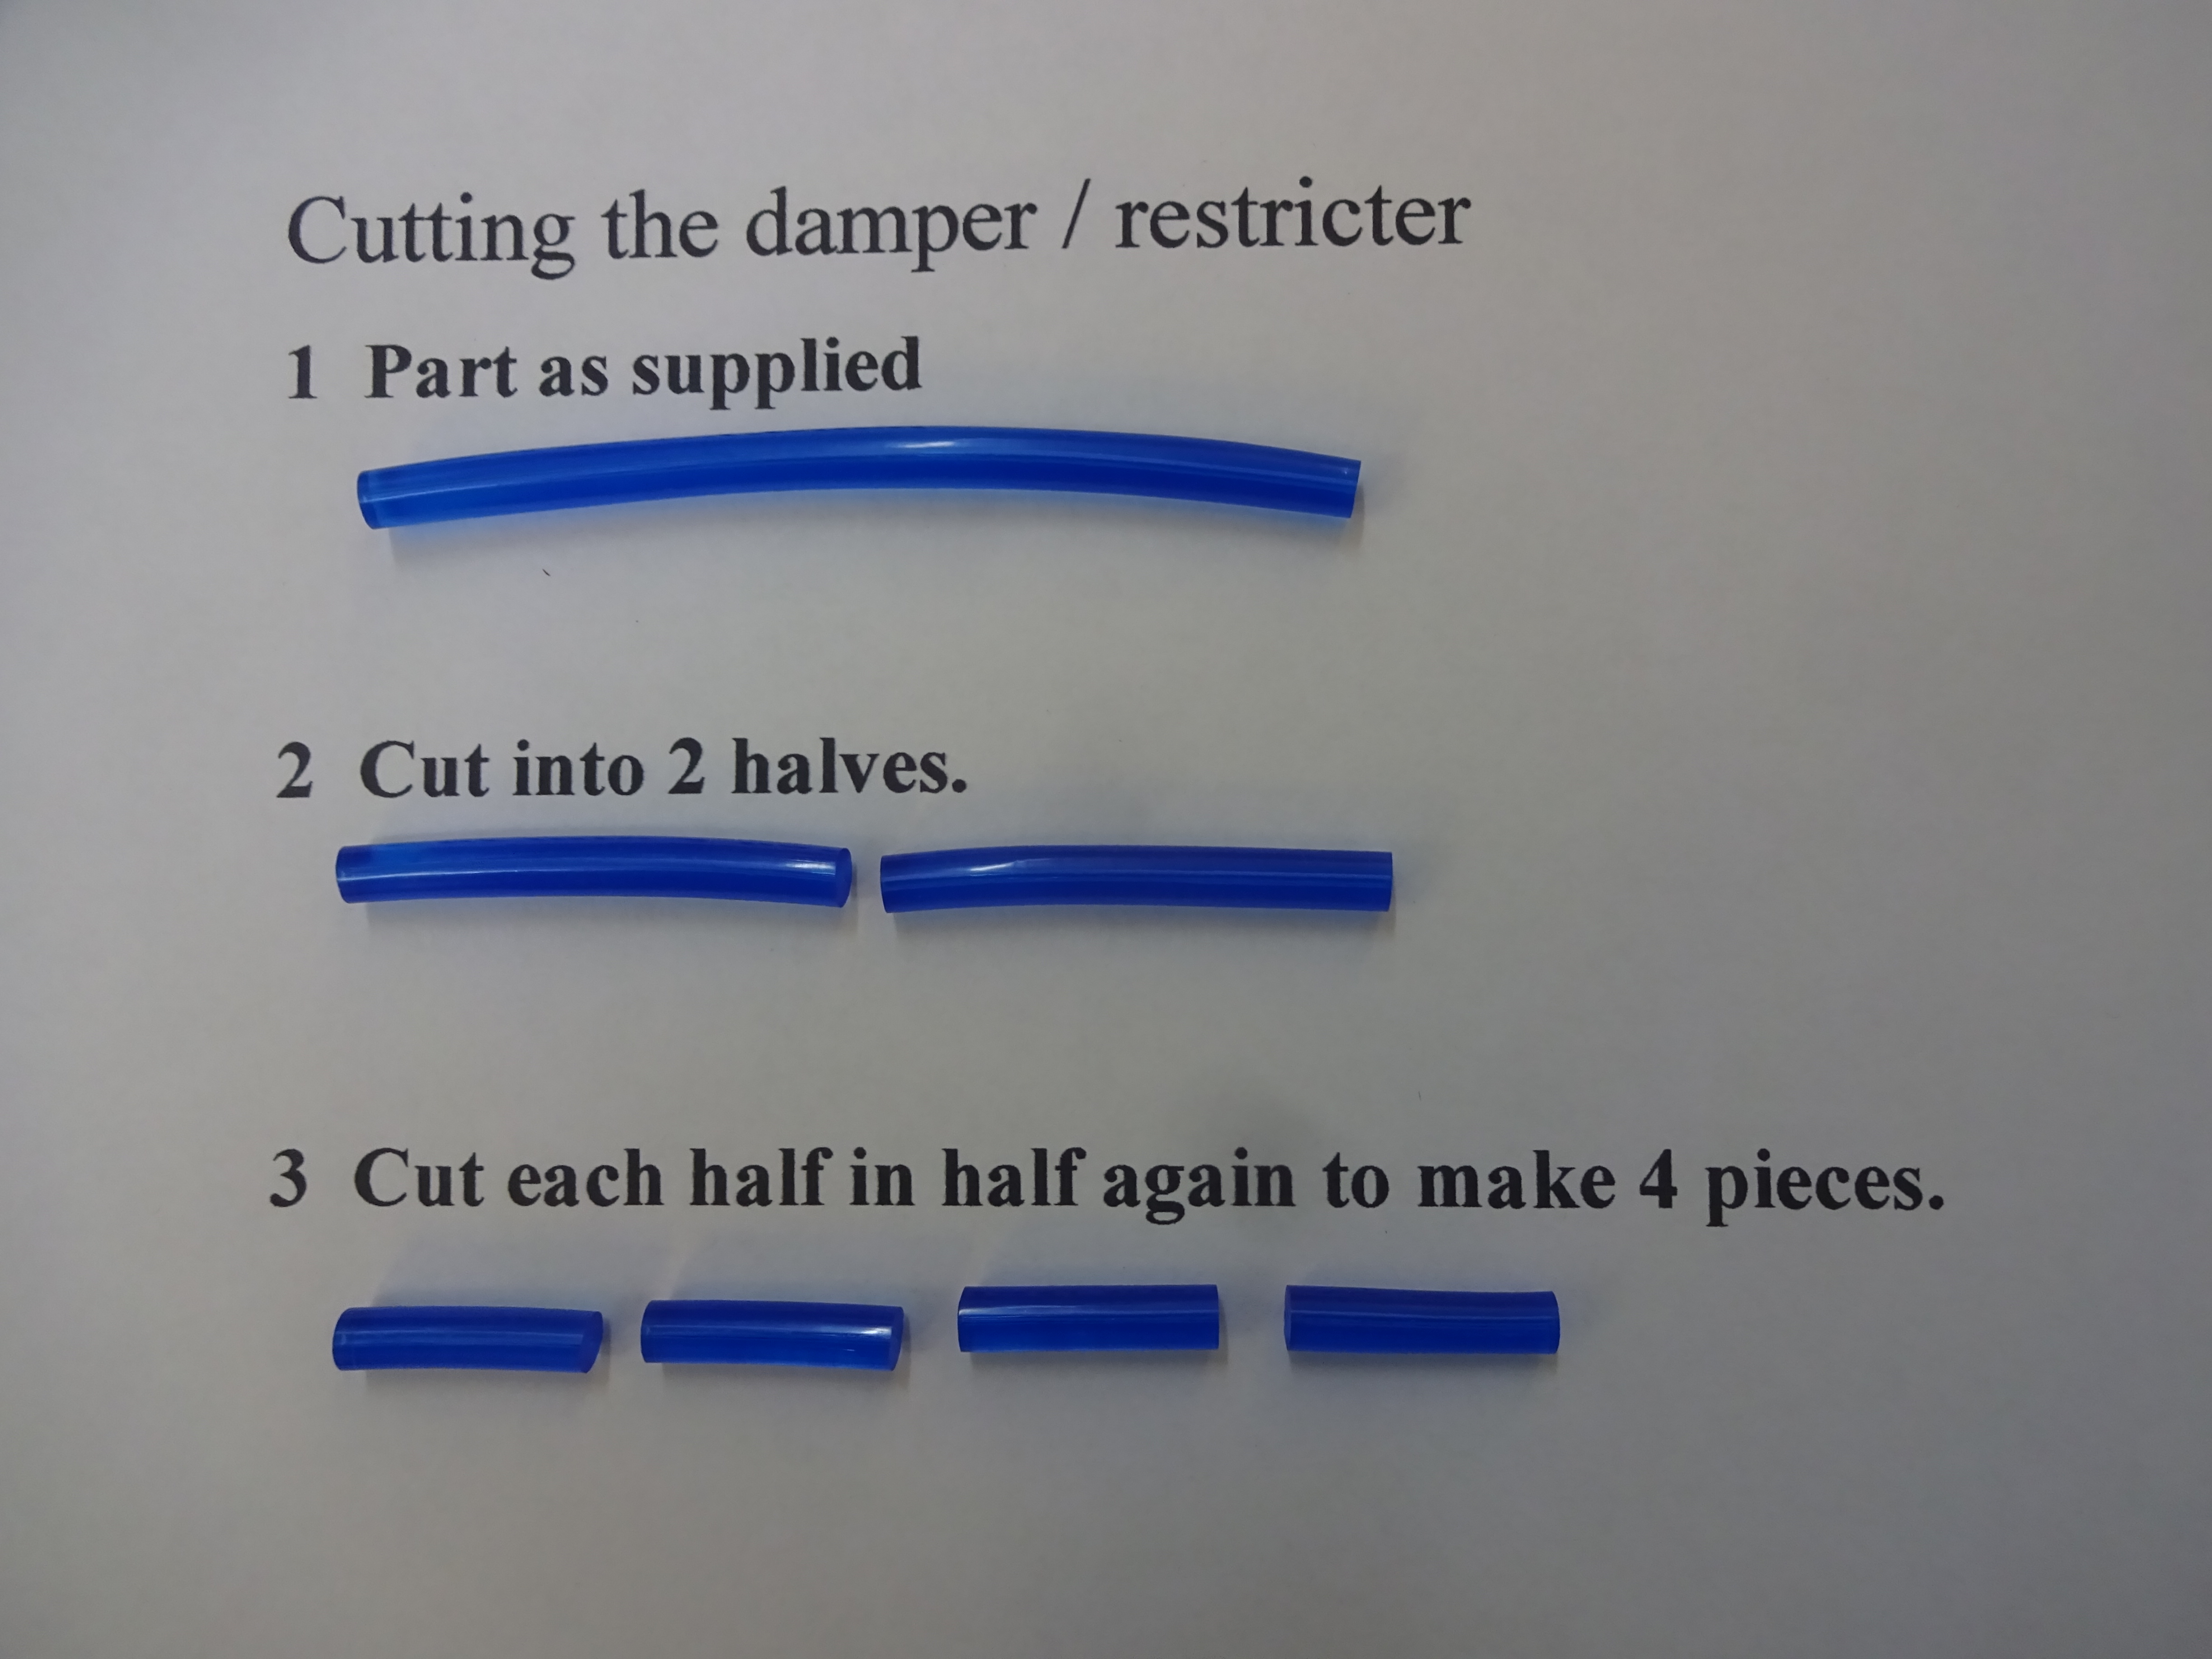
How to make the dampers
Refer to drawing opposite. In the bag with theadapters you will have
received a fine bore thick wall translucent blue plastic tube (No 1). It is about 8cm long x 5mm diameter. With a craft knife cut the thick wall tube into four roughly equal pieces. These are the four restricters (No 2). (For the 2-column the tube is about 4cm long and is cut into 2 pieces.)
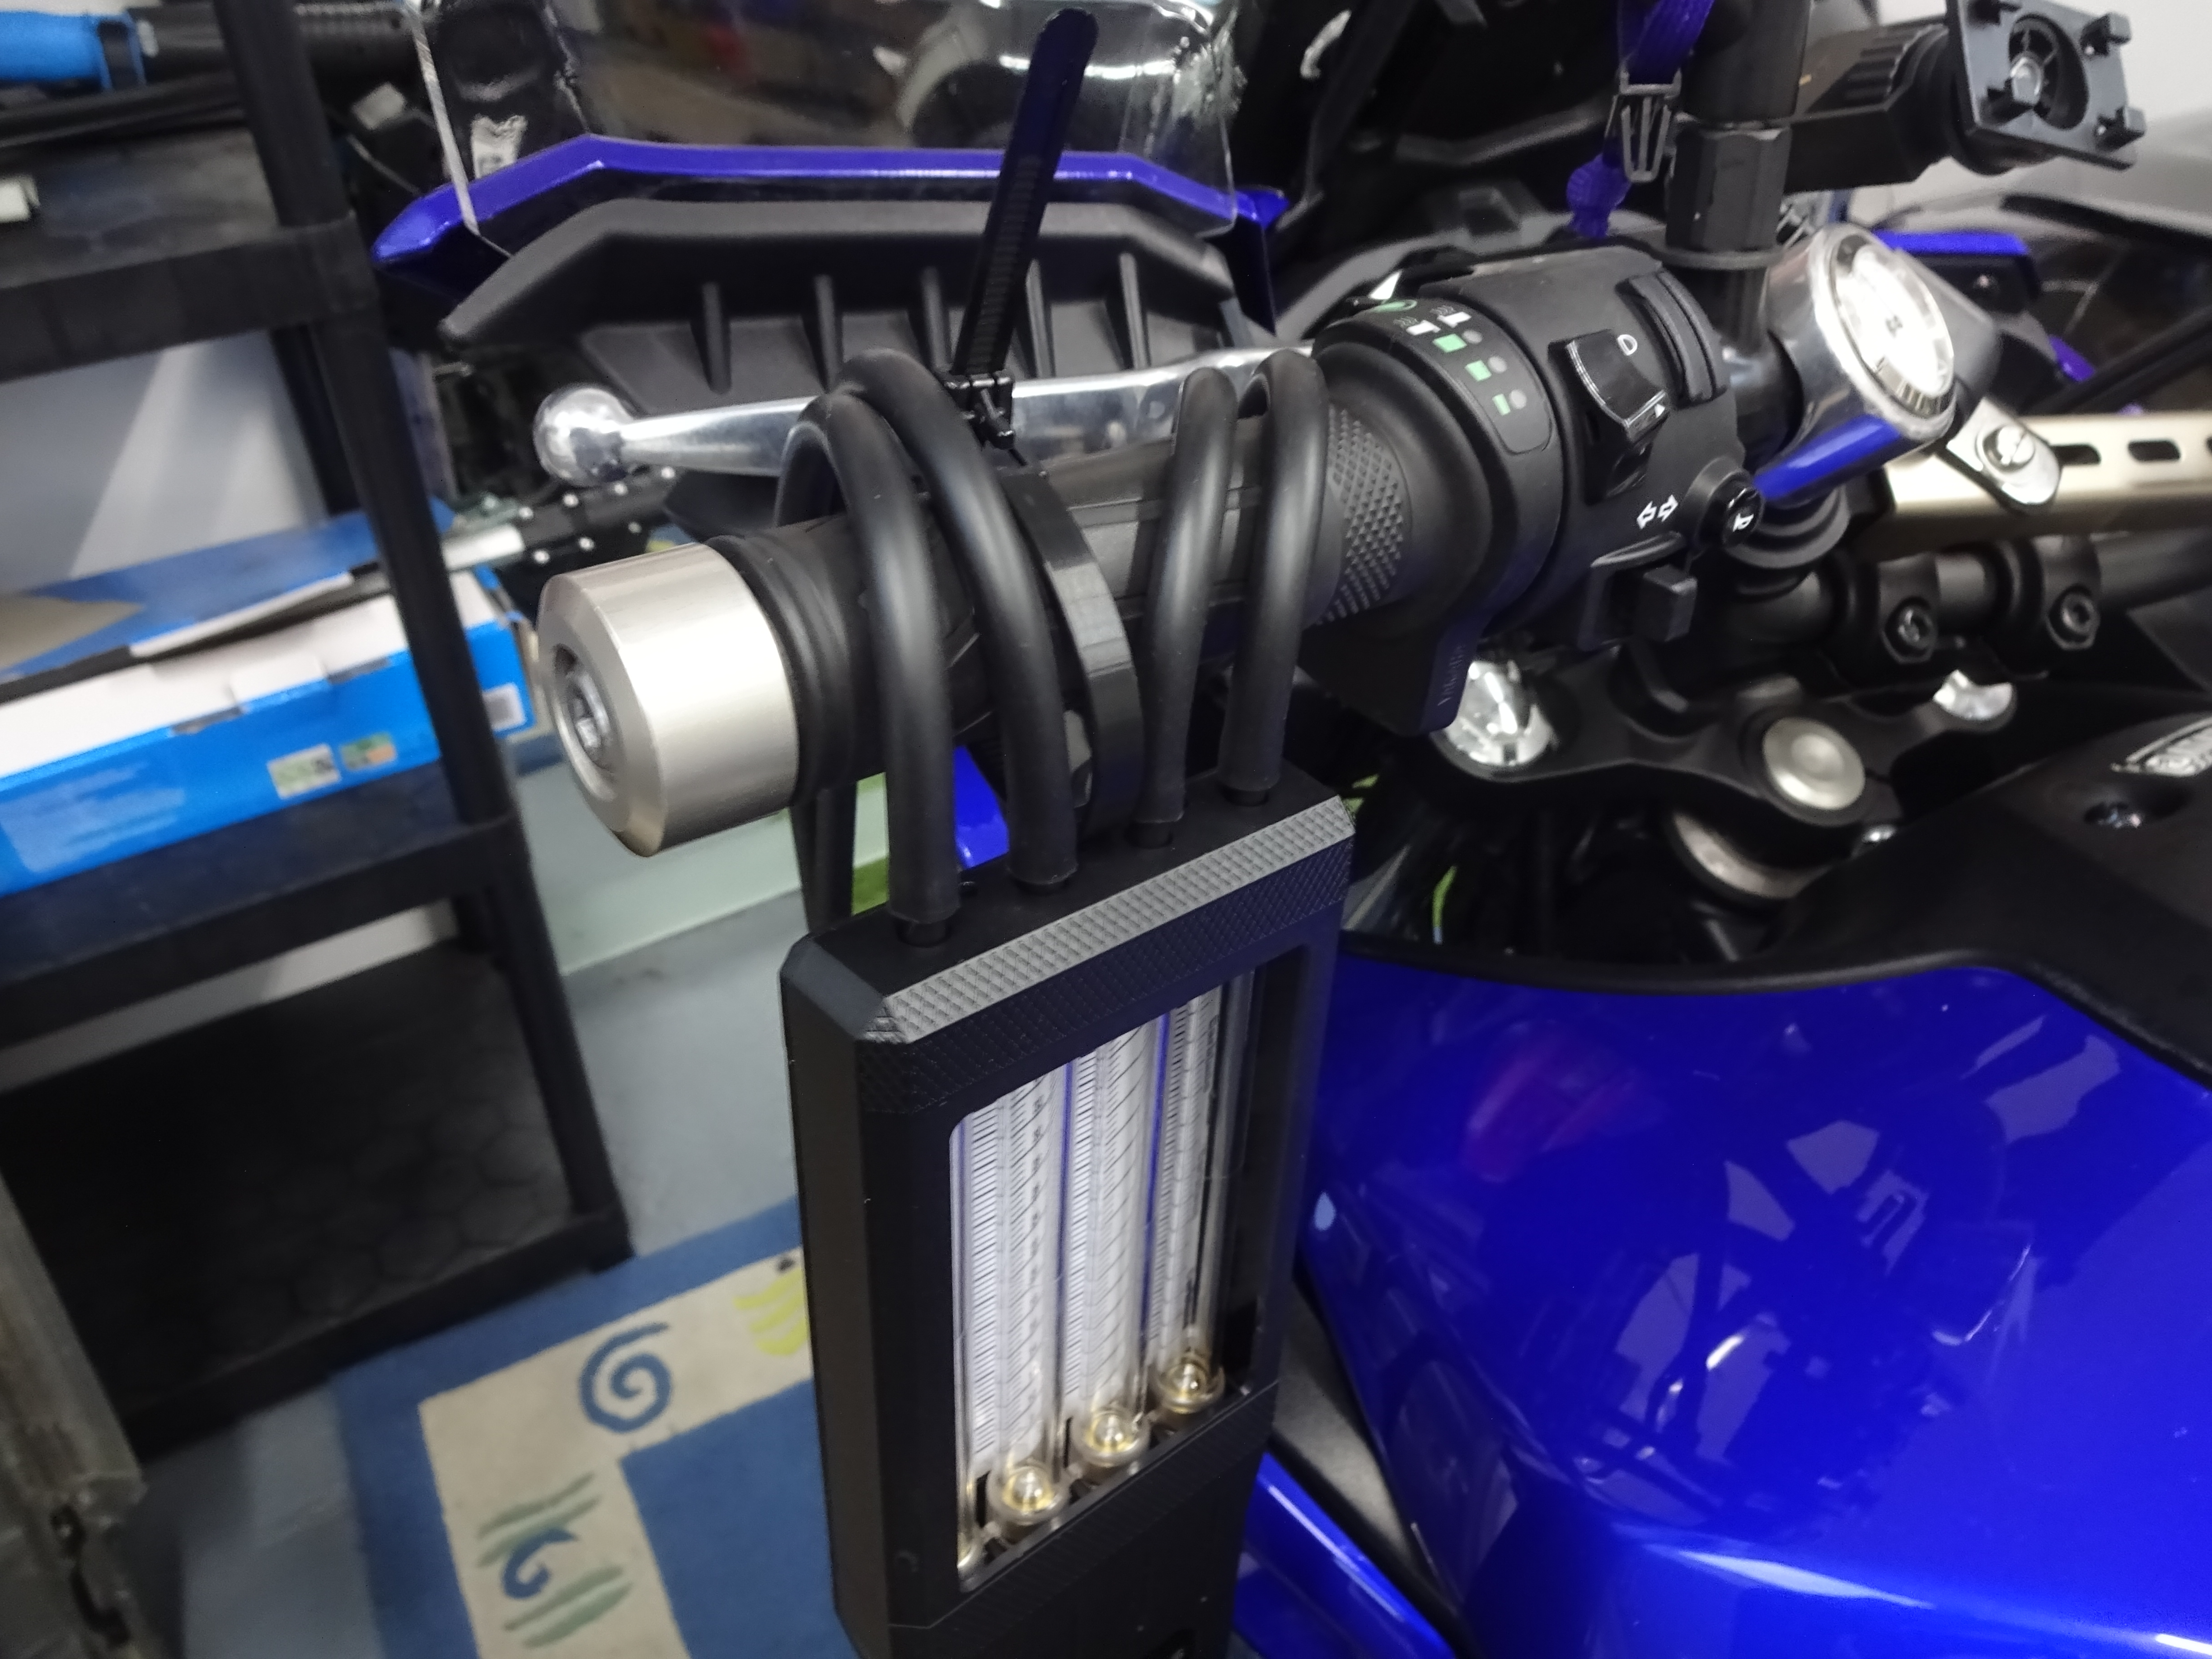
Cut about 10cm (4”) off the end of each 1 metre black rubber hose. Push a restricter into the 10cm rubber hose. Now push the remaining 90cm (3ft) rubber hose onto the other side of the restricter (No 3). Do this for each hose.
The length of the rubber hose is not critical. You can make them longer by adding more hose. The restricters need to be about 90cm from the Carbtune. The longer the tube between the restricters and the Carbtune, the more the damping. The shorter, thel ess the damping.
The restricted part of rubber tube must go towards the engine, not the Carbtune. If the restricters are beside the Carbtune it will not be properly damped. The restricters will reduce fluctuations to acceptable levels for most bikes but some bikes may still give readings that pulsate too much even with the dampers in place. Moving the gauges very slightly off vertical will add some extra friction and damping but make sure the rods are still pulsating slightly or the readings may be affected.
The rods need to pulsate to some degree for the gauge to work properly.
see detailed photos Click on photo to increase size Video of cutting restricters
Using the Gauges
The gauges are calibrated in CmHg (centimetres ofmercury).
Hang the gauges vertically from the left handlebar grip or other convenient position (lifting handle on BMW twins) using releasable cable clip.
The clip fits into the slot at top of gauge and you push it into the slot from the front of the gauge. (Release clip by pushing the tabs.
Once pushed the clip will release immediately so make sure you are holding Carbtune).
If your bike needs the adapters remove the blanking screws from the inlets, then connect the adapters to your bike. Remove and blank off any balance pipes.
For removal only there is a slot in the end of the adapter to use a screwdriver to remove it. If the adapters feels tight let the engine cool first before removing. Do not under any circumstances use a screwdriver to tighten the adapters.
Make sure the adapters are seated but don't overtighten. Finger tight using fingers not tools.
Other makes have stubs on the inlets covered by rubber caps or tiny screws which you remove. (On a very few bikes the stubs are of a very small diameter and need a sleeve-down tube to connect.)
Push the rubber tubes onto the spigots on top of the gauge. Make sure you have the correct tube connected to the correct inlet. Keep rubber tubes and the gauge itself away from hot exhausts and make sure the rubber tubes are not kinked or flattened. Route rubber tubes over handlebar grip as shown in photo on the right.
After use remove black rubber tubes from gauge first then from the inlets. Hang rubber tubes to drain any fuel from them. When using if there is any blowback of fuel into the gauges hold them high, upside-down and connected to a running engine until all fuel has disappeared from gauge scale tubes.
Remember the engine and exhausts are hot so be careful with any spilt fuel as it is a fire risk.
Hang the guages from the handlebar using the clip supplied
Video of cable clip and hoses
For difficult to get at inlets cut 1 inch of rubber from the end of one of the rubber tubes and push it onto a ball-point pen. Push the adapters into the other end of the cut off rubber and use the pen as a flexible extension to screw the adapters in and out of the inlets.
General Hints
Read your workshop manual.The engine should be warm and running at just enough above idle speed so it doesn’t falter and stop during adjustments. Don’t try to balance at high engine speeds. Adjust to makers specification or average of initial readings, but the readings should be balanced to within 2 cmHg(some models up to 4 cmHg) of each other.
Adjust in small amounts, waiting a few seconds between each part adjustment. Write each adjustment down so you can go back to the original settings if necessary.
If lending gauges to a friend please ensure your friend has a copy of the instructions and is familiar with the gauges.
Ideally balance the throttle valves after you have serviced the rest of your bike.
A Guide to Carburettor Synchronising
Carb balance will affect the response,smoothness, mileage, performance and running temperature of your engine.
Carb synchronisation consists of adjusting each throttle valve for carburettors or fuel injection throats so that they pass as much fuel-air mixture as all the others. This balances the load carried by each piston.
If one carb is opened further than the others that cylinder will run hotter than the others. The other carbs will also supply a richer mixture and mileage will suffer.
The actual mechanics of carb balancing vary a lot. Some bikes are balanced by adjusting the relative length of the throttle cables (R series BMWs) while others have a system of levers with adjustment screws but they all adjust the relative position of the throttle slides or throttle butterflies of each carb to each other or to a master preset carb.
A workshop manual for your model is very useful as the balancing procedure for different models can vary in detail. Familiarise yourself with the section on throttle valve synchronising.
We assume that anybody using the Carbtune will have some knowledge of the mechanics of their vehicle particularly in regard to safely removing the fuel tank. If you feel unable to do this or the other tasks safely it will be better to leave them to an expert.
Carb adjustments should always come last when servicing or rebuilding your bike. The rest of the bike should be in good tune before balancing, and that means the points, plugs, ignition, tappets, air filter and oil, should all be in proper service.
Air leaks between the airbox and carbs, carbs and cylinder head inlets, and in the exhaust system or any blockages in these systems will affect the carb balance and should be rectified before starting.
Step 1:
Fit the gauges to the carbs. Warm the engine until it will idle reliably without choke. The engine should not be at full operating temperature at this point as it may lead to overheating later. If you have a fan place it so that it blows cold air over the cylinder head or radiator. Don't remove the fuel tank at this stage unless it is necessary to do so to connect the gauges. Work in a well ventilated area so that the exhaust fumes will dissipate.
Step 2:
Set the engine to slightly above idle by adjusting the master idle screw, then read the gauges.
Some workshop manuals specify a vacuum reading, usually at a high idle. The full width scale lines on the gauge are 2cmHg apart and most factories specify the total difference between the lowest and highest readings should be 2cmHg.
If the carbs need to be balanced then switch off engine and remove fuel tank (most bikes) so that you can get at the adjusters. On some bikes you can turn the tank back to front and set it on the seat or rear frame and still be able to reconnect the fuel lines. Secure tank with plenty of luggage straps.
If the fuel taps are vacuum operated set them on prime. Remember fuel is dangerous both as a fire risk and fume inhalation. Be very careful.
If you use an extension fuel line with a remote tank (something like a lawnmower tank) keep it roughly at the same height that your fuel tank would normally be. If you are very experienced you may be able to balance your carbs with the fuel left in the float bowls.
Make sure that the vacuum gauge lines are correctly routed so that you don't find yourself adjusting the wrong carb.
Yes, this bike needs adjusting
Step 3:
Start the engine and determine which throttle valves have to be adjusted. If there is a master carb all the others will have to be adjusted to match it. If all the carbs are adjustable find one that is nearest to the middle reading and use it as the reference carb.
Adjust the carbs until all the columns are within 2cmHg. It doesn’t really matter whereabouts on the scale the readings are as long as you get them all to within 2cmHg of each other.
The carbs are very sensitive to adjustment and even doing up the locknuts can affect the readings.
There are special tools available from the importer or tool specialists to
make this easier but you can do the same thing by using a small box spanner
to hold the locknuts and with along screwdriver down the centre to turn the
adjustment screw.
The individual adjustment screws can be found on the side of the carbs or on the operating linkages. On some carbs they are under the carb tops which have to be removed. Some models have spring loaded adjusters which are easier to adjust.
Where each carb has an individual adjuster check to see that each carb has enough adjustment left. If one is almost out of adjuster threads then turn all of them back a couple of turns and set the cable adjuster and master idle screw to match.
Adjust one carb and then check the reading. Give the gauge a few seconds to settle after each part adjustment. It is often necessary to gently blip the throttle to seat the carb that has just been adjusted.
It is a good idea to write down all the adjustments you make. This way you can go back to the original settings if you make a mistake.
On older Suzuki models with CV carbs (exceptGSX400F) the two outside carbs are set about 2.5 - 3.0cmHg higher than the inside pair. For specific model details consult your workshop manual or the Suzuki importer. (If the airbox has been removed set all the carbs the same).
Adjust the carburettors to get the readings as even as possible
Step 4:
When all the carbs are within 2cmHg, tighten the locknuts if applicable, making sure you don't upset the readings.
Switch off the engine, remove the gauge fittings and replace the blanking screws or caps on the bike. It is sometimes easier to remove the adapters if you let the engine cool down. Replace the fuel tank and ride the bike for a few minutes to get it to its normal temperature, then set the idle speed with the master idle screw.
Modern bikes hold their carb settings very well and you shouldn't have to adjust them more often than once every 5,000 miles. Older machines can be more difficult to balance to within 2cmHg and need more frequent adjustment. Bikes like BMW twins with separate cables for each carb also need more frequent adjustment.
As long as the rest of the bike is in good tune and you have some patience you will find it fairly easy and very rewarding to balance the carbs.
To between two blue lines, and that's it!
What do the readings mean?
The absolute readings aren't important as long as they are within the manufacturers specifications. It's the comparative reading that's important not the absolute values.
If one carb has a significantly different reading to the others there can be several reasons for it.
It may be at the end of it's adjustment so you'll have to back off all the adjusters and start again.
It may be that a rubber tube has been wrongly routed so that you have been adjusting the wrong carb or that the rubber tube is kinked or flattened on its route to the carb or is loose.
Possibly there is a leak in the carb to airbox or carb to head joints.
It may be an engine fault and a compression test can help to pinpoint the problem.
If you suspect there is a leak in the intake manifold let the engine idle and spray a fine mist of water around the inlet area. A drop in engine speed can indicate a leak in the inlet system.
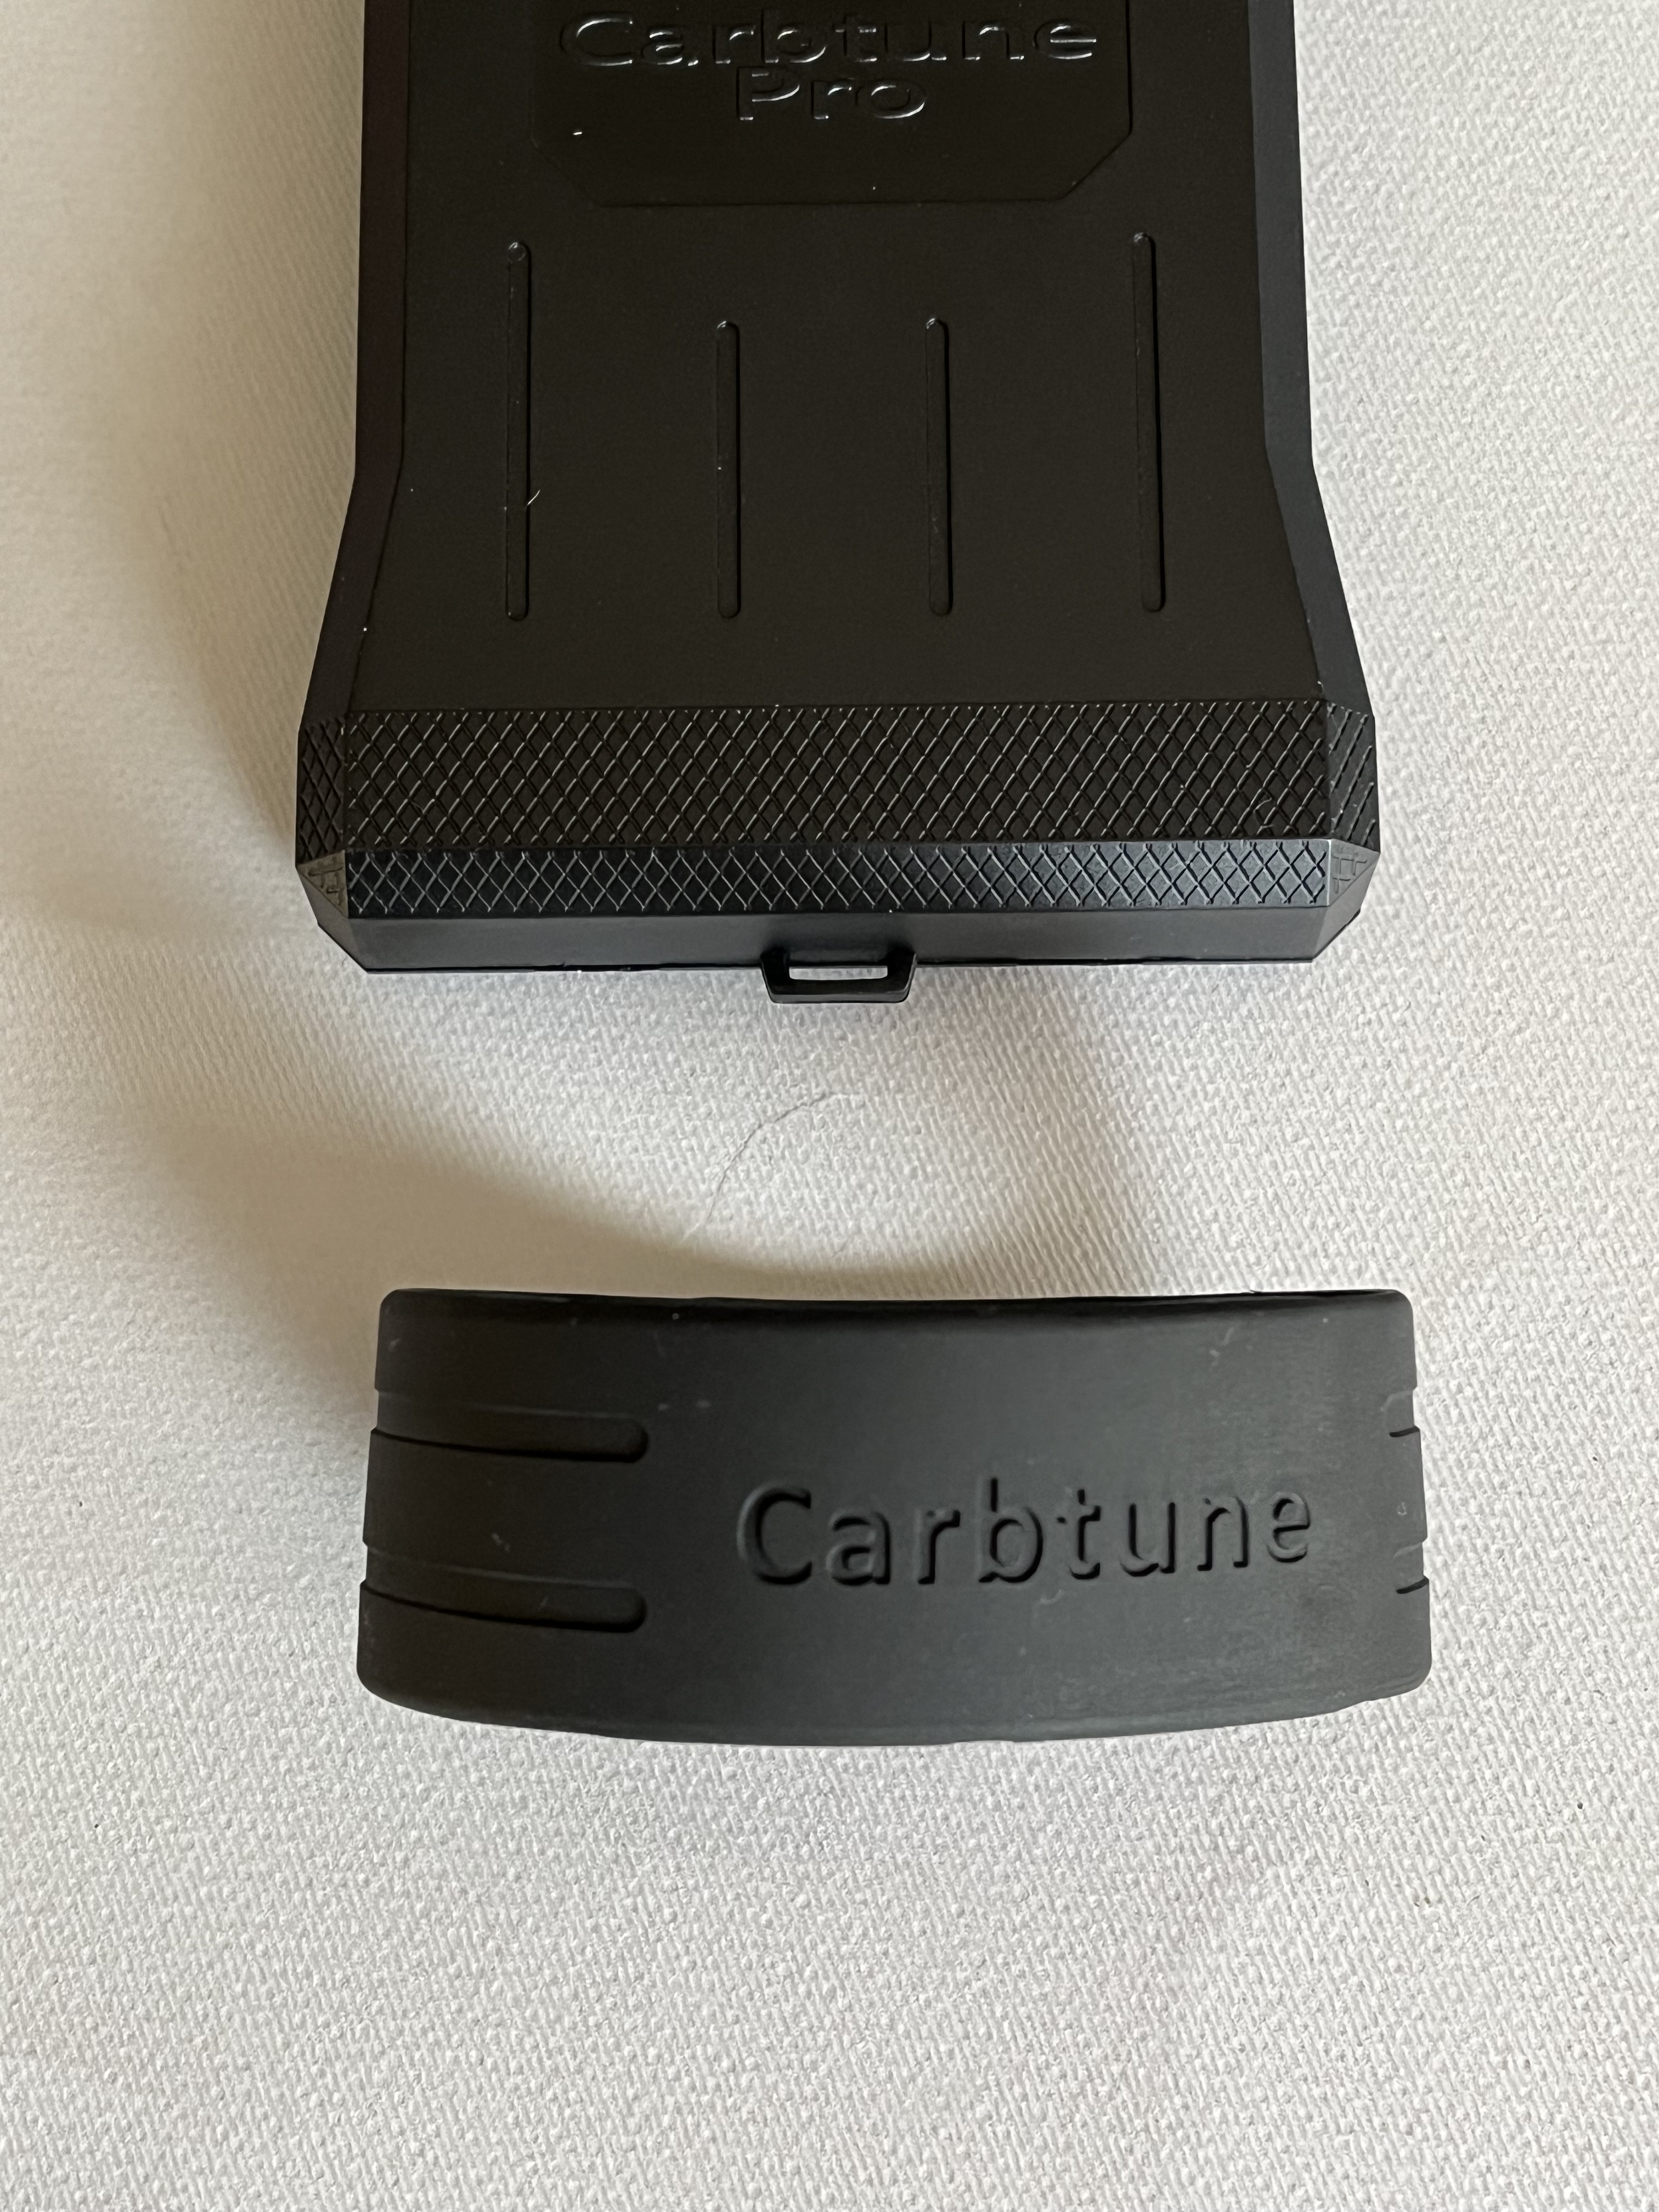
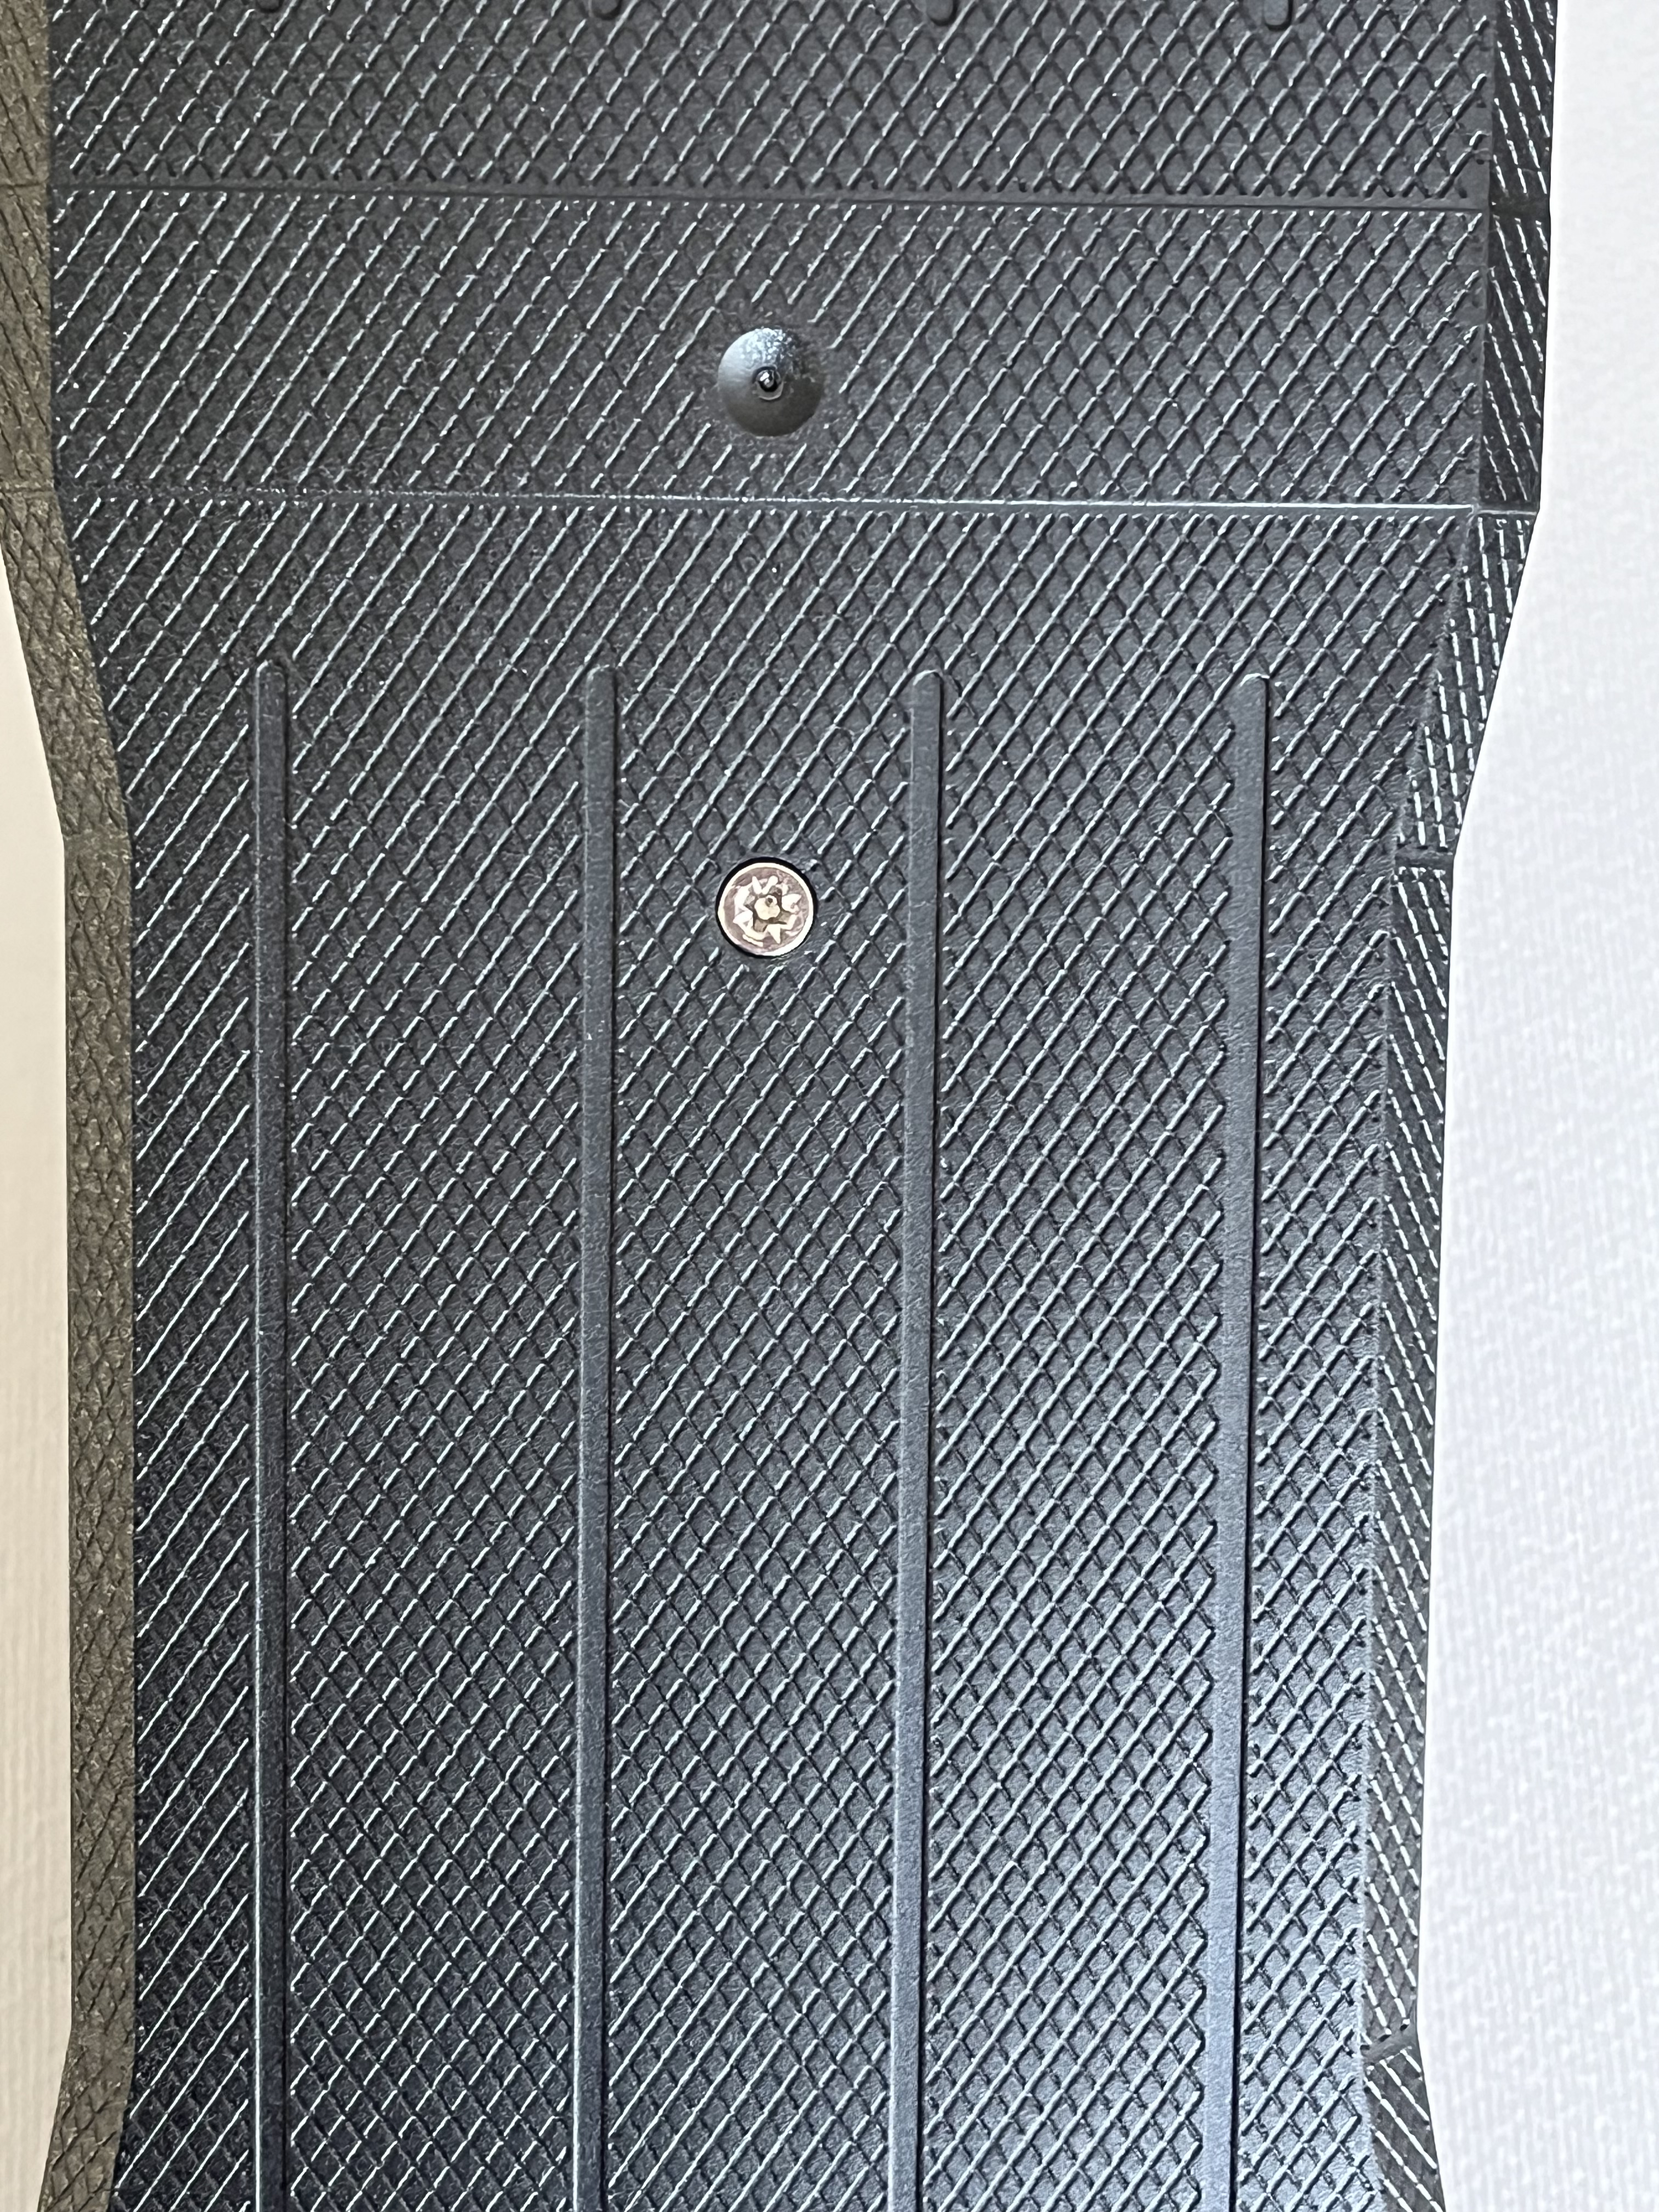
Rubber Bumper
Information on the Gauge
Gauges do not need to be zeroed or calibrated. All parts have been matched at assembly.
Damping of the gauges and friction of the rods may be slightly different in each column. This does not affect final readings, only the time it takes to get there.
Put rubber bumper on like this.
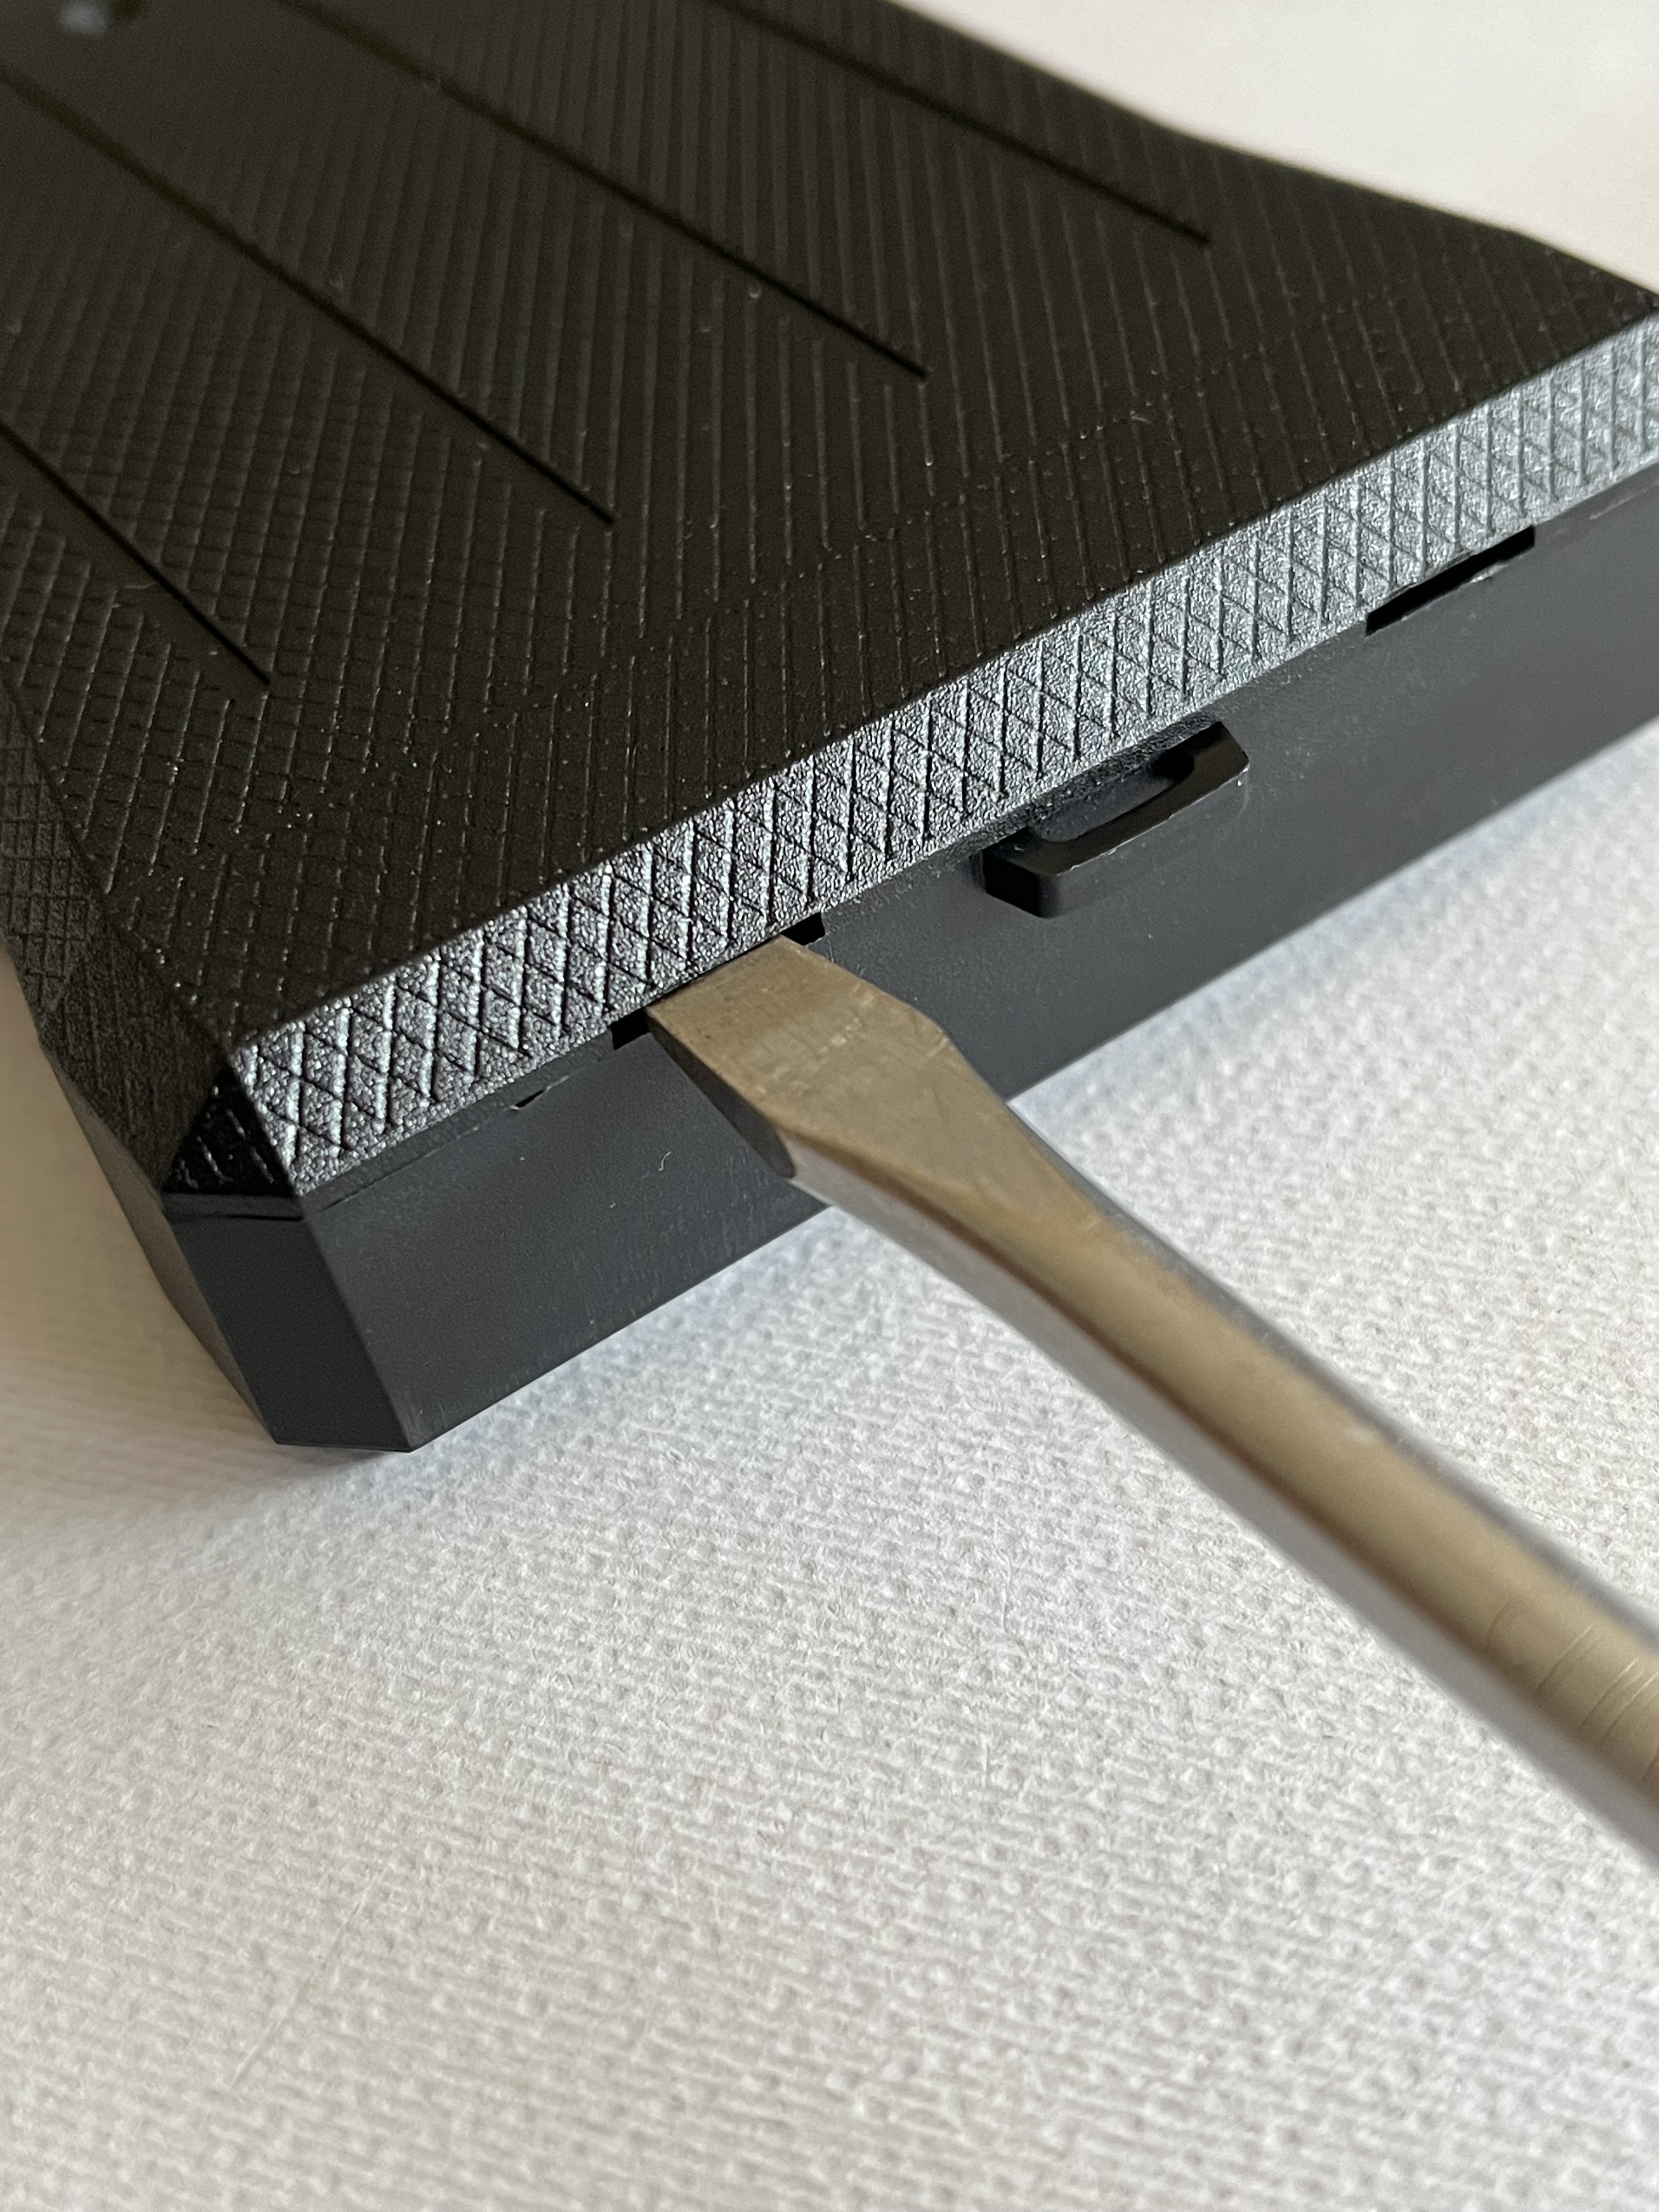
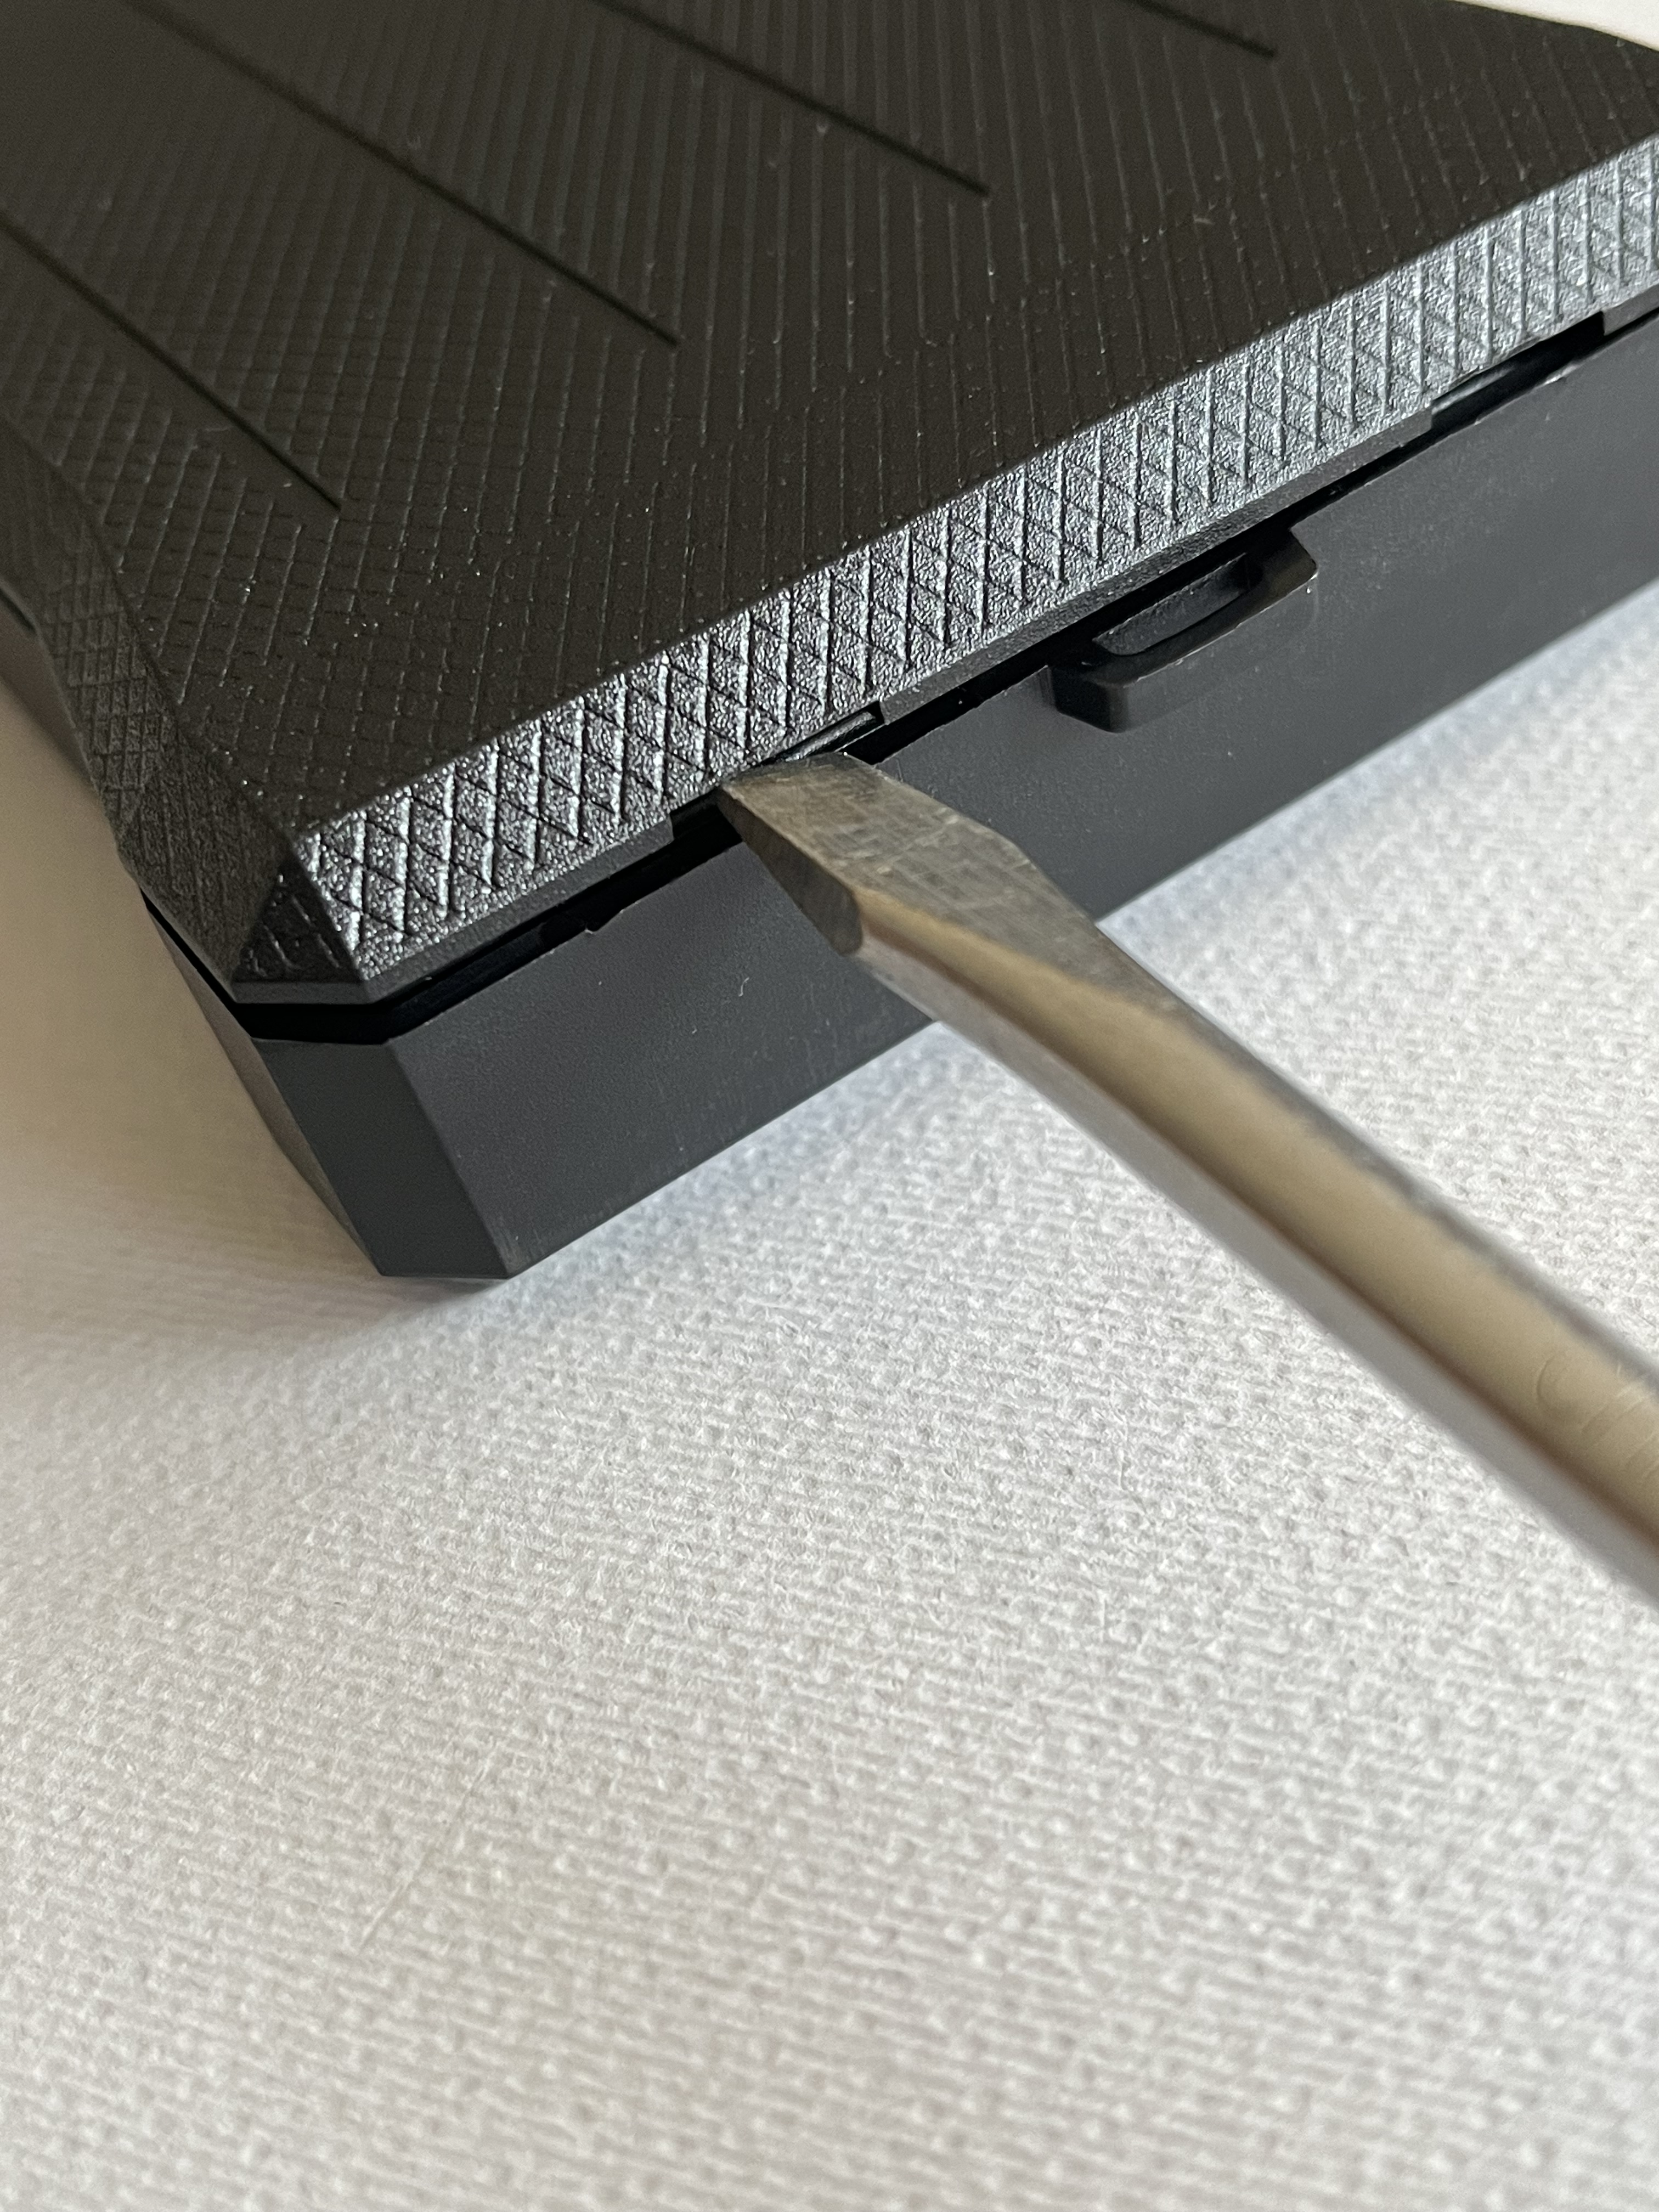
Maintenance of the Carbtune
If dirt or grease gets into the gauges and makes rod movement sticky then they can be cleaned.
Remove rubber
bumper if used. Place Carbtune flat on its face. Remove single screw
in centre of back.
At base there are slots. Put a flat blade in one of the slots and
twist slightly to disengage the bump engagement. Slide back cover
away from top of gauge at shallow angle. (The 2 engagement pins in
top need to slide out) Do not bend out as this will damage pins.
You will see the rod and tube assemblies. At the middle of the rod tube assembly you will see the brass rod guides. Each tube clips into the gauge at the brass guide. You will need to release the guide from the push fit clip. Just pull it up (away from clip) slightly (or push from the front) and it will spring out of the clip and be at an angle. The top part of the tube with the black spigot will remain where it is. Slide the rod and spring out of the brass guide. Do not remove the brass guide from the clear plastic tube. There is no need to remove the tube assembly from the casing. On reassembly slide rod into guide. It is too long to go back into the casing unless you slide it into the guide a few centimetres. Align the lugs on the clear plastic tube and push the brass guide until it locates into its clip.
To replace cover it is reverse
to re-assemble. Slide lid in at low angle to engage pins in back
with locations holes on top of case between spigots. When pins are
in, click back in to engage base bumps. Replace central screw. Put
bumper on.
Important - Each rod, spring must go back in its original position. Do not mix. Do not put loose springs together as they will tangle.
It's best to only remove one rod assembly at a time, clean it and
then replace before you remove the next rod assembly.
For simplicity only remove one rod at a time for cleaning. Carefully remove spring from rod and polish rod and inside of rod guide with a cloth
or cotton bud. Do not scratch.
For severe staining use a brillo pad or the finest steel wool to polish rods. Wash and dry thoroughly afterwards. Only assemble when dry.
Do not remove brass guides or black spigots from the clear plastic tubes. Contact us for advice first
But remember "if it ain't broke don't fix it."
For maintenance first remove this screw
Then prise up cover using flat blade in these slots
Twist blade to release cover
For permanent adapter fixture in the engine do not use an O-ring but use high temperature locking thread sealant with brass adapters available here.
Spare parts are available from Morgan Carbtune at the address below. Ring, fax, write or email for price details.
Problems
Check the FAQ page for common question and answers. Any instruction updates or amendments will also feature on the website.
The Carbtune Pro and previous Carbtunes have been tested and used on many different bike, car, marine, and aviation engines. Obviously we cannot test every bike, car, boat or plane so if you encounter any problems with the operation of the gauge or find the supplied range of fittings don't fit then please contact us with the details. Quite often problems can be quickly sorted out over the phone or by email.
Guarantee
Carbtune is guaranteed against defects in materials and workmanship for a period of 12 months from the date of purchase. Should your Carbtune be damaged through such a defect, please
contact the manufacturer, details below.
We will repair or replace the equipment (at our option) provided you have followed the usage instructions. This does not affect your statutory rights as a consumer.
Specification may change without notice.
Morgan Carbtune Ltd Unit 33W Townsend Enterprise Park Townsend Street Belfast BT13 2ES United Kingdom